Decreasing defects in wire harnesses
Wire harnesses are used to organise a group of wires that transmit power and information to devices to perform specific functions. Commonly used in aerospace and automotive industries, wire harnesses come in various shapes and dimensions and are designed to fit in specific spaces in an organised and protected manner.
This application note examines the common challenges facing wire harness manufacturers to produce fault free wire harnesses.
Design/Research and Development
Hidden behind the steering wheel or within the airframe of an aircraft, wire harnesses are designed to manage wires and fit within a specified space. Engineers will select the correct type of wire and designers must consider how space limitations will affect the size and shape of the wire harness and the workflow without disturbing transmission or preventing electrical issues. At this stage of the process using 3D modelling packages and 3D imaging systems prevents many workflow related faults.
Prototyping
A wire harness prototype brings the design to life. The working prototype can now be tested for its intended use before production. Inspection and measurement tools may be used during this stage to ensure the prototype matches the design by comparing it to the CAD drawing. If a wire harness fails to meet the specification at this point, it would be reworked or scrapped. Getting the wire harness prototype correct at this stage saves production time and costs down the road.
Inbound inspection
Wire and components used from suppliers should be inspected before the assembly process to prevent defects before production. The wire should be measured to make sure it matches the gauge required.
Connectors should be inspected for damage and spacing in the terminals should be measured to prevent the pins from being placed too close to each other. Using a digital system is ideal for inspection since documentation may be required if incoming products are not correct or defective.
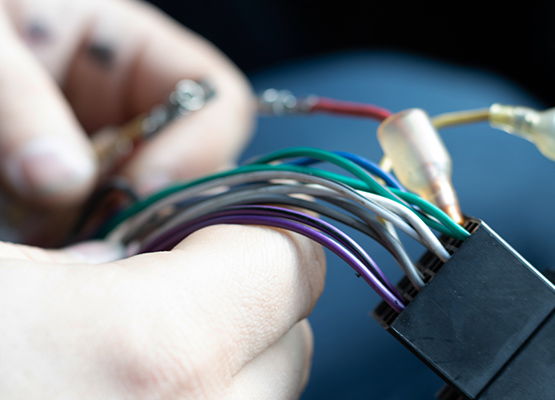
Assembly
Once the prototype passes inspection, the production of the wire harness can begin. Following quality processes and utilising inspection systems in each step of the assembly process will improve the quality of the finished wire harness. Accuracy during this stage is crucial in order to meet production deadlines, prevent lost profits, and uphold a company’s quality reputation. The wires in the wire harness are cut to the length indicated in the design. A wire cutting machine will measure, mark, and cut each wire individually. The wires are then labelled and laid out to match the design. The insulation at the ends of the wire are then stripped, contacts are crimped onto the end of the wire and the wire is inserted into the connector.
Due to the number of processes involving manual assembly during this stage, most defects are created during the assembly process. At the assembly station, the insulation may be manually stripped to reveal the core wire. Stripped wires must be free from any damage and deformities and the insulation must be unbroken. Damaged wire and insulation could result in potential safety issues. Using magnification during the stripping process helps in the removal of the insulation as well as inspection of the wire after the stripping process.
Once the wires have been stripped, contacts are then crimped onto the end of the wires by automatic or manual crimpers. Failure to crimp to the correct height causes defective continuity or displacement of the wire. Extreme crimping can lead to wire damage and insufficient crimping will result in the wires becoming loose and disconnected when pulled. Whether the crimping process is performed by a machine or manually, examining the finished crimped wires through an inspection system will identify any defects and prevent faults that can occur once the wire harness is finally connected.
After the wires pass the crimping process they are manually fitted with terminals or pins. The wires are then sealed by soldering or inserted directly into the terminal. Since wire harnesses and their components are continually getting smaller, using a microscope during the soldering and terminal placement process will help the assembler see the parts clearly to avoid damage and defects at this stage.
Testing
Once the wire harness is produced it will undergo electrical safety testing. This critical step ensures the final function will perform correctly. The final inspection will include pull tests, continuity, a megohm test, and visual inspection under magnification. Minimal final adjustments are made at this stage to the wire harness to pass testing.
Here are a few defects to look out for during a visual inspection:
- Wires should be free of any deformities
- Wires are secured by the crimp and the crimp is placed at the correct height
- Wires are together, no bird caging
- Insulation is free from cracks, fraying, discolouration, and pinching
- The insulation covers the wire and extends past the insulation crimp tab
- The contact is free from any defects
Achieving Quality
The wire harnesses manufacturing process contains several steps with a large amount of manual production. To obtain the highest level of quality, manufacturers have strict quality processes in place. Most manufacturers will follow the “IPC/WHMA-A-620A Requirements and Acceptance for Cable and Wire Harness Assemblies” and AS9100C a widely adopted quality management system for the aerospace industry.
Manufacturing fault free harnesses is challenging. However, having a clearly defined quality control process which includes using tailored inspection equipment from design to testing, will limit faults, improve production output, and reduce costs.
Some of our customers use the following products
Inspection and assembly
- Mantis Elite
- Vision Luxo Bench Magnifier
Digital Inspection
- EVO Cam ll
3D Stereo Digital Inspection/Display
- DRV-Z1
Measurement
- TVM
- Swift PRO