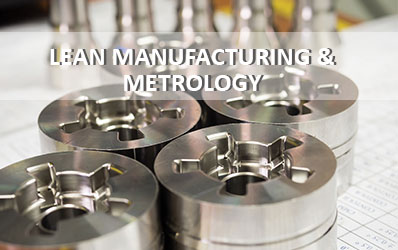
Since its beginnings at Toyota in the 1980’s Lean manufacturing, with its drive to improve operational efficiency, has become embedded into the culture of any successful manufacturer.
The 5 Lean principles – value, value streams, flow, pull and perfection – have helped manufacturers to remain resilient in increasingly competitive global markets.
The overall goal of Lean manufacturing is to minimise waste and improve productivity whilst maintaining exceptional value for the customer. A significant part of this process is an effective quality control system, which is achieved by using two of the key principles, mapping the value stream and creating an optimum flow. Where multiple components or intricate parts of differing sizes are involved these principles are particularly important.
Metrology, Quality Control and the Value Stream
When mapping the value stream for quality control measurements it is necessary to record the following details:
- The number of components that will need to be measured for quality control
- The number of different measurements required for each component
- The degree of accuracy required for each measurement
- How many of these measurements can be taken with a non-contact measurement system
- How many of these measurements require contact measurement
- The number of axes in which measurements are to be taken – 2 axes (X, Y) or 3 axes (X, Y and Z)
- The number of times the part has to be handled
- The frequency at which the measurement process is conducted. Is it a frequent, routine process or an infrequent, more ad-hoc process.
- The equipment that is required to undertake the various measurements. This list should consider not only equipment types, but also ease of use for the operators.
- The number of operators required to complete the measurement process
Metrology, Quality Control and the Flow
By reviewing the mapping of the value stream you will be able to identify areas that can be adjusted in order to improve the flow of the quality control process. The aim of this to maximise efficiencies and reduce waste.
Key areas to review in order to create an optimum flow are:
- Time Management – Increasing the speed of the process by eliminating the number of processes or by simplifying the process.
- Quality Management – ensuring the accuracy of all measurement to avoid waste and ensure quality standards are met
- Cross Functionality – assessing the practicality of the equipment, can it perform multiple tasks and is it suitable for use by multi-skilled operators
Time Management, Quality Management and Cross Functionality all need to be perfectly aligned to provide efficiency of production or flow.
Time Management
When components are intricate, even measuring a single item can take time and as we all know ‘time is money’. Any procedures that can reduce measuring time, without adversely affecting accuracy, will be beneficial to the bottom line.
A measurement system that can offer multiple options will decrease component handling time, reducing the overall quality control period. The option to switch between contact and non-contact measurement without handling the component will greatly condense the timescale for any complex or lengthy measurement routine. Another time saving solution is the flexibility to measure on all 3 axes using a single piece of equipment, thereby simplifying the measurement of 3D forms.
A large capacity stage will deliver the ability to measure multiple components in a single process.
In the case of measuring multiple components of varying sizes, using a CNC system provides the ability to automate a measurement protocol, again speeding up the process, particularly in instances where magnification changes are a requirement.
Quality Management
Component handling not only impacts the speed of the process, but also the accuracy of the results.
When measuring complex parts, contact measurements may be necessary. A touch probe changer will allow a seamless transition between probe and styli types. This will avoid the need to manually change probes, which would interrupt the measurement routine and could result in movement of the part being measured, thus impacting on measurement results.
When taking multiple automated measurements, the stability of the equipment is key. If components shift during the measuring process, accuracy will be compromised. Ensuring the measuring equipment is stabilised with a heavy base, such as granite, provides the ideal solution. Choosing the right fixturing to hold components during measurement routines is also important.
Cross Functionality
Finally, efficiency of production will be compromised if the system and equipment used are so complex that it requires in-depth training and cross-checking.
It may be the case that the same measurement process will need to be conducted by multiple operators. In these instances it would be impractical to take the time to provide in-depth training to an entire team. Using software to automate these regular measurement procedures allows all team members to conduct the same tests with little or no training, without compromising on accuracy and speed.
That said there may also be the requirement for more than one person to have the necessary skills to create an automated quality control process. Where this is an issue it would be practical to select an intuitive, industry standard software programme. This may mean that the skillset already exists within the company, avoiding the need for any additional specialised training.
Not all parts manufactured within a company need a routine measurement process. There may be instances where a small run of bespoke or prototype components need to be measured. If this is a consideration, it would be advantageous to use the same equipment as that used for automated processes.
The LVC400 large capacity CNC video measurement system has been designed to match all of the options outlined here. Contact Vision Engineering if you would like a demonstration to better understand how the LVC400 can improve productivity for your business.
Author: Guven Turemen – Group Commercial Metrology Manager


