All worthwhile things progress. Even the greatest discoveries of humankind have evolved and improved. Better materials, technology, and design have taken the wheel from the barrow to the automobile and given us greater control and benefits. Along the way, what works gets added and what doesn’t falls to the wayside, however, every once in a while the wayside should be reexamined.
The Inspection Process
At its most basic, the inspection process is about having a plan—detailed specifications for production and a time, place, people, and tools to ensure products meet those specifications. Back in medieval times, the entire process depended on the craftsman and their knowledge and skills in procuring the right materials, wielding the right tools, and creating a product from start to finish. As mass-production revolutionized the manufacturing industry, these responsibilities were allocated to specifically skilled professionals, and tailored technologies.
For example, in modern manufacturing gatekeeper inspectors review materials upon their arrival to the factory; parts and products are visually examined, weighed, and measured. The inspection process also takes place during and after production. Inspectors, along with quality managers, engineers, and skilled professionals ensure the finished product meets all customer specifications and the requirements of manufacturing standards.
As new technologies were introduced to the manufacturing process, manufacturing evolved and improved, The medieval craftsman that once measured by hand was surpassed by the technician using a handheld gage and they were surpassed by a coordinate measurement machine that tackled measurement tasks automatically, virtually free of any human interaction. Automation, robotics, sensor technology, and even artificial intelligence are currently pushing manufacturing further towards a process that eliminates the need to interrupt the production line in order to conduct inspections.

Saving time during the inspection process in order to increase production may be the main objective of many manufacturers. But at what cost? When it comes to delivering a quality product, the cost, size of operation, and the product’s end-use must be considered. In addition, even an in-line inspection process must be tested off-line every so often by inspecting random samples taken from the production line. It is for these reasons off-line inspection still retains its place in today’s manufacturing process.
In fact, even while the process goals of in-line versus off-line inspection methods may seem incompatible, if we consider the advantages and disadvantages of both, in-line and off-line inspection, we may question, “why not both?” An admirable question that deserves investigation, particularly with the technology and products for off-line inspection designed to provide collaboration with in-line operations.
Off-line Inspection Revisited
A couple of typical applications that traditionally benefit from off-line (manual) inspection include process inspection and failure analysis. According to Mike Prestoy, Senior Applications Engineer ACI Technologies*, while the basic operation and concepts behind these processes are not complicated, they are detail-rich. “The components are getting smaller all the time and the value of a human being to examine such small assemblies is worthwhile,” said Prestoy. “An element to remember is that good inspection equipment is like health insurance, you may go stretches where you don’t need it, but when you do, it is vital.”
Much of the benefit of off-line inspection comes from root cause analysis. As Prestoy pointed out, just about every electronics shop has a magnification system to examine its products. “The question is how effective an inspection system is in discovering root issues,” said Prestoy. “If an issue or problem can be observed, the root cause can usually be established.” It is through the use of off-line inspection systems that the root cause of defects can be determined and corrected.
“In-line inspection machines can process and inspect according to specified criteria on a part or assembly, but if something fails the automated inspection, the machine doesn’t indicate the root cause of the failure,” said Prestoy. “This is where good inspection equipment can be invaluable. You can spot the root cause in convincing detail.”
Manual inspection systems can be optical or digital. The system can be used purely for inspection, a microscope for example, or can be used to obtain precise measurements. Selecting an inspection system that is easy to use without causing a delay to the production line is vital to the manufacturing process.
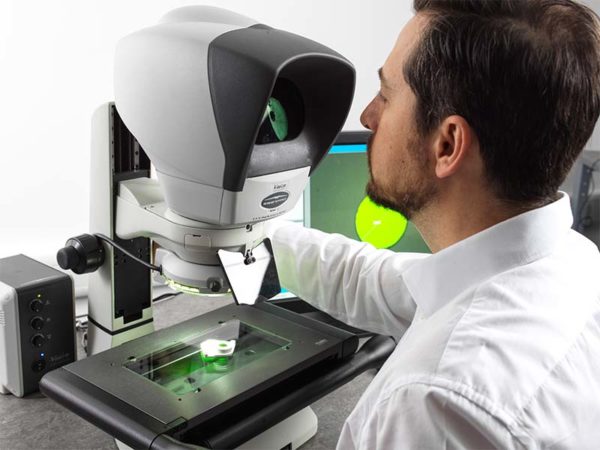
Inspection systems such as the Lynx EVO, Mantis, and Swift PRO eyepiece-less optical systems by Vision Engineering are known for their ease of use, high quality, and innovative technologies. The patented eyepiece-less technology improves user comfort during long periods of inspection with a reduced need for rest breaks, therefore reducing the time it takes for inspection and improving production time. While these systems are ideal for fault detection and reworking, digital inspection systems like the EVO CAM ll, with high magnification and resolution, are best used to identify and document defects spotted before, during, and after manufacturing.

Touted as an ultimate cost saver, an in-line inspection system may cut down on the overall time of the inspection process, but, while confirming that, in the end, there can be cost savings associated with off-line inspection, Prestoy pointed out, “the savings is in time and speed of resolution of the issue, and a better understanding of the process. Inspection systems that deliver fast results with part recognition such as the TVM field of view system or an LVC automated 3-axis system with its palletizing feature, save the time needed to keep production moving.
“Every person who is in the electronics manufacturing business is instantly delighted with the images of premium optical inspection systems,” Prestoy continued. “A premium system can show details that a low-cost system cannot. Recognizing these subtle details, imperfections, and outlier problems can drive toward a product with improved quality.”
There are many systems available to identify these defects. Users can choose between optical and digital systems, each with its own set of merits, to meet their unique needs. Optical inspection systems are great for detection and reworking while digital inspection systems offer great fault detection and repeatability.
Conclusion
It is extremely important to understand your quality process and its applications. Saving time is essential to any modern manufacturing operation, but understanding the tradeoffs in cost and accuracy is paramount. Knowing the benefits and disadvantages of both in- and off-line inspection, and how both approaches could work together in your operation could revolutionize your quality and manufacturing process.


